Skip to content
01 Open-source Stream Deck

Build your own
Stream Deck.

A 3.5" touchscreen with fifteen programmable keys, driven by an ESP32 in a case you print yourself. The Windows app sets up the keys and switches layouts for the program in front of you.

Scroll to take it apart
02 On the desk

Small enough
for any desk.

The printed stand tilts the screen towards you, so the keys are easy to read and reach next to your keyboard. A single USB cable powers the deck and carries its data.

Four rubber feet in the stand keep it from sliding when you tap.

03 Inside

Every part, in order.

  1. 01Front bezel Printed, with a separate stripe inlay.
  2. 023.5" touch display ILI9488, 480×320, SPI.
  3. 03ESP32 DevKit Glued in, with its USB port at the opening.
  4. 04Rear shell Printed, holds the ESP32 and the wiring.
  5. 05Desk stand Printed, with two guide rails and pockets for four feet.
  6. 06M3×14 screws Four close the case, one holds the stand.
Full bill of materials
04 Software

Keys that follow your work.

Link a page of keys to a program and the deck shows it whenever that program is in front. Edits in the app appear on the screen as soon as you make them.

3.5"480×320 SPI touch
5×3Key grid, per page
ESP32WROOM-32 DevKit
27Key actions in the app
MITCode & case files
01 How it comes together

Print it, wire it,
flash it.

No custom circuit board. The electronics are two off-the-shelf modules joined by eleven wires, and the case comes off your printer.

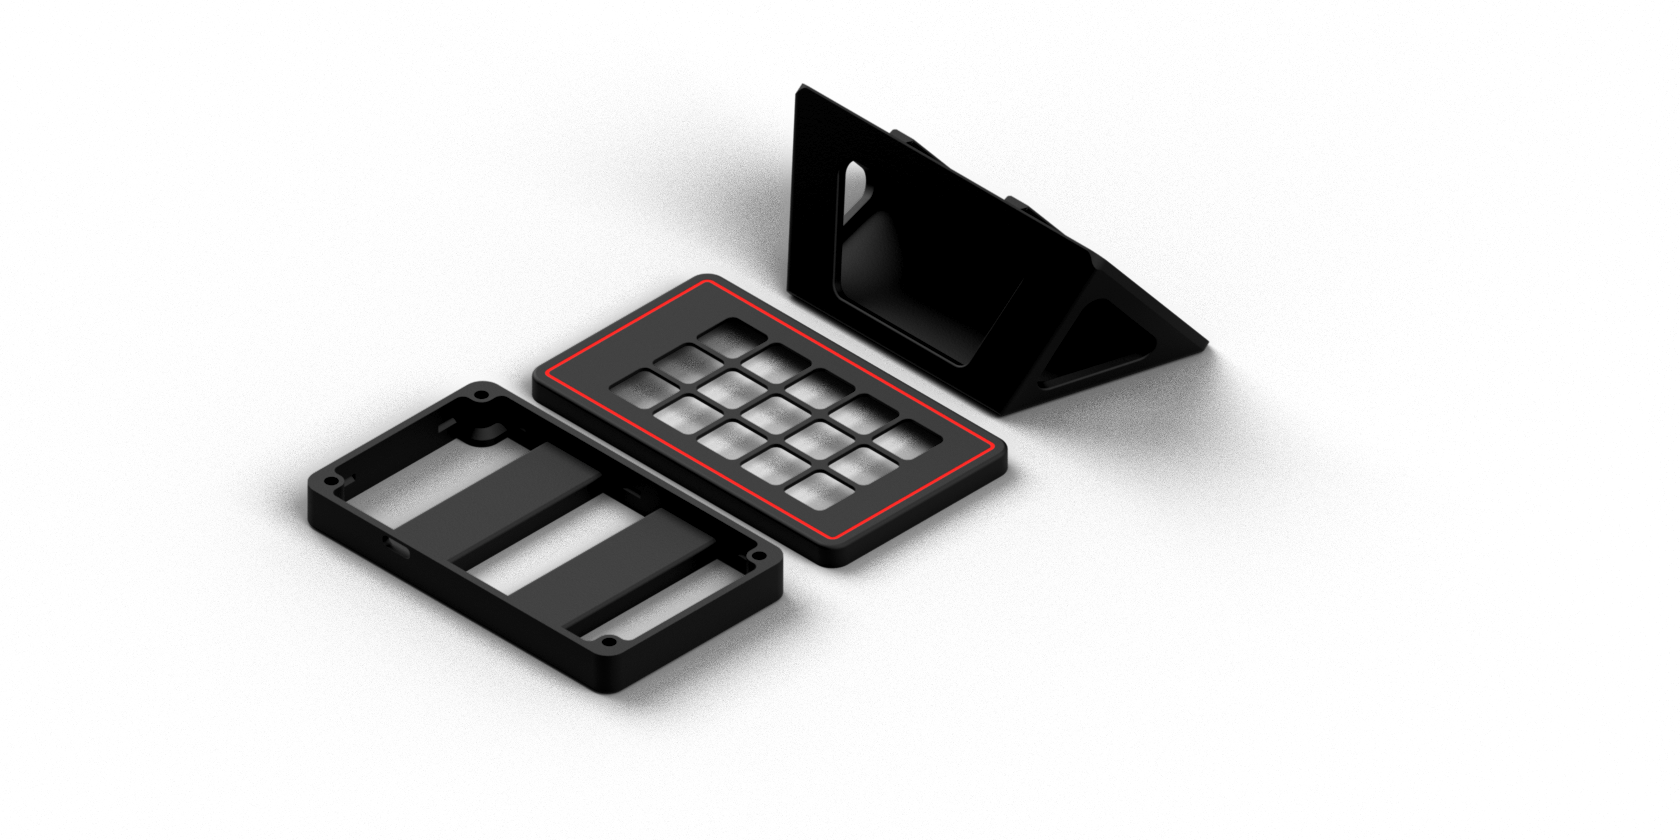
Rear shell, front bezel and stand as printed parts
STEP 1

Print the case

Print the bezel, rear shell and stand in PETG at 0.2 mm layers, with supports from the build plate only.

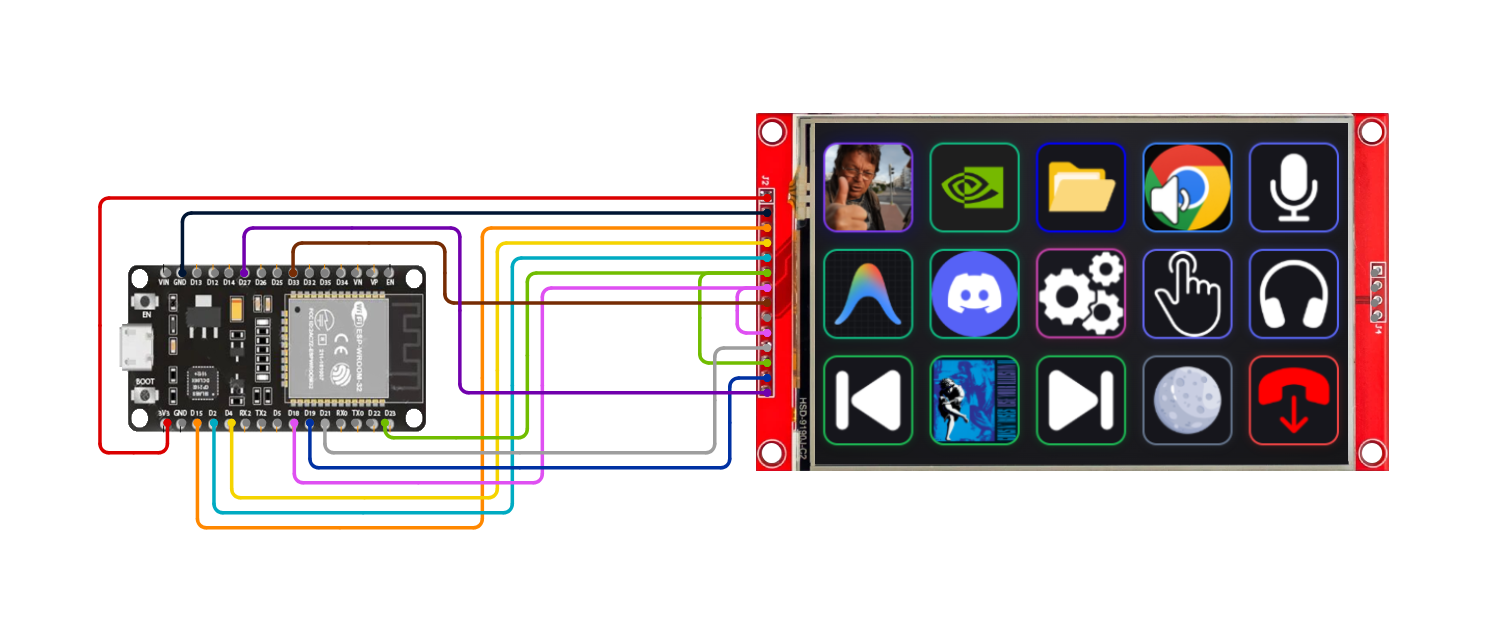
Wiring between the ESP32 and the display
STEP 2

Wire eleven lines

Solder eleven wires from the ESP32 to the display: power, the SPI bus and the touch controller. The build guide has a checklist that ticks them off.

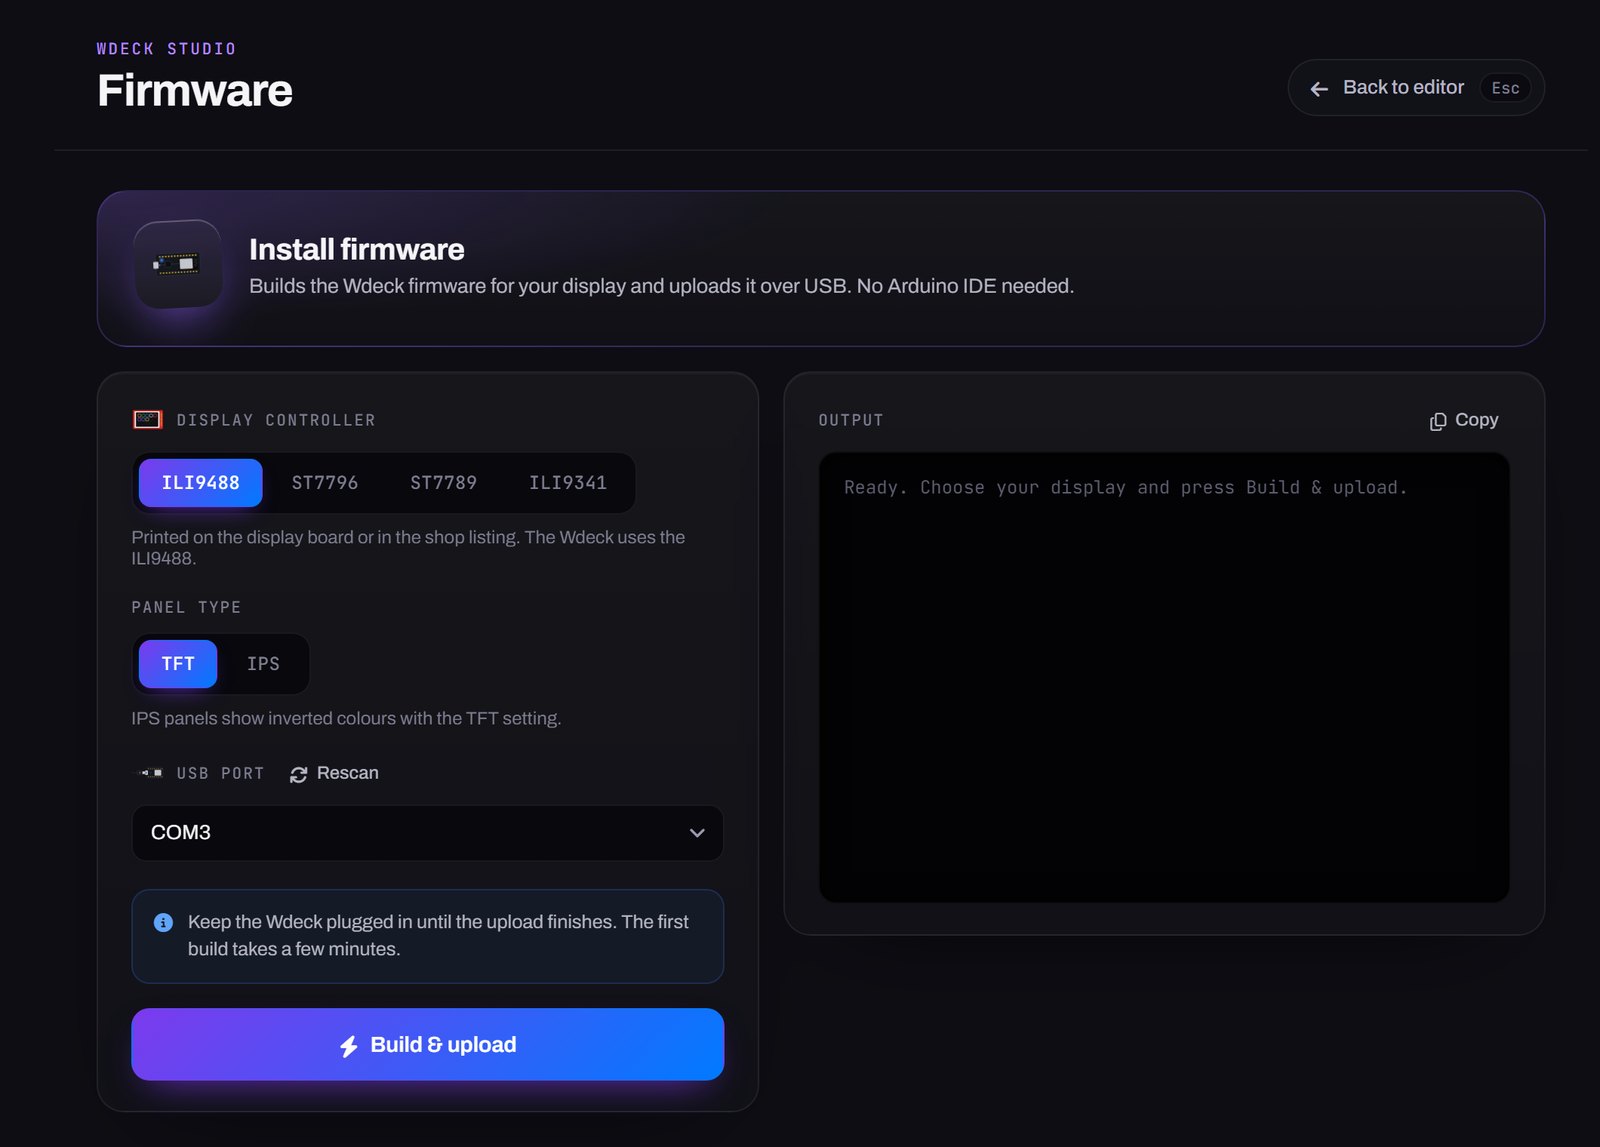
Install firmware screen inside the Wdeck app
STEP 3

Flash from the app

Connect the deck over USB and press Build & upload in the app. It finds the port and installs the firmware for you, with no Arduino IDE to set up. Or flash it right in the browser.

02 Desktop app

Drag an action onto a key.

One Windows app does it all: you design the layout, it flashes the firmware, and it runs in the background to carry out what each key does.

Pick an action from the toolbox, drop it on a key, and the deck shows it straight away.

  • Automatic profiles. Each program can have its own page, shown when it is in front.
  • Hotkeys & launchers. Send key combinations, start programs or open websites.
  • Volume per app. Turn one program up, down or mute it without the Windows mixer.
  • Discord & OBS. Mute or leave a call, switch scenes, start a recording or stream.
  • Folders. One key opens another page of fifteen, so you never run out.
Plug in — the layout syncs over USBv1.1.0
03 Filament combinations

Pick colours before
you print.

The case and the accent stripe can be printed in different filaments. Try a pair on the model — your choice carries over to every view of the deck on this site.

Loading model
Wdeck DIYDrag to rotate
Case — shell, stand & bezel
Accent stripe

The STL files for all printed parts are free to download on Printables.

STL files on Printables